

Cart
0
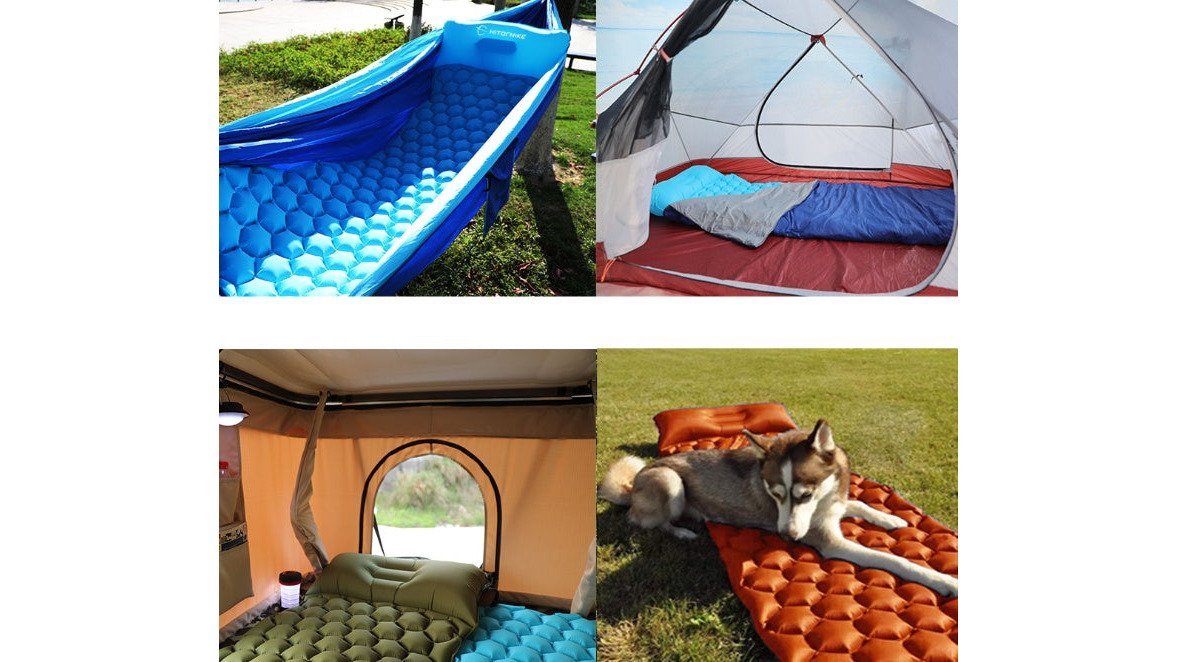
Table of Contents
- Why Your Sleeping Pad Keeps Sliding
- How to Keep a Sleeping Pad From Sliding in a Tent
- How to Keep a Sleeping Pad From Sliding on a Cot
- Using Sleeping Pad Straps for Stability
- Non-Slip Mat for Sleeping Pad: Choosing the Right Option
- Quick Fixes for Emergency Situations
- Preventing Sliding Before Your Trip
- Frequently Asked Questions
Last Updated: October 21, 2026
Why Your Sleeping Pad Keeps Sliding
A shifting pad disrupts sleep and exposes you to cold ground.
The good news: how to keep sleeping pad from sliding has multiple solutions, from free friction fixes to dedicated straps that set up in 30 seconds.
Here's every method that works.
How to Keep a Sleeping Pad From Sliding in a Tent
The tent floor is the main challenge: nylon slides on nylon, and your pad will migrate unless you add friction or anchor it.
Ground Traction Methods
Use a ground tarp or footprint. A footprint, closed-cell foam, or yoga mat under your pad grips better than bare nylon.
Add grip tape to your pad. Skateboard grip tape sticks to the pad's bottom and boosts friction dramatically.
Try a non-slip mat. Purpose-built rubber, cork, or synthetic mats sit between pad and floor and grip better than improvised fixes.
Anchoring Techniques
Stake down your sleeping pad. If your pad has loops or grommets, drive stakes at head and foot and tie it down with paracord. This completely stops sliding.
Use sleeping pad straps. Dedicated straps wrap around your pad and anchor to stakes or tent structure.
Create a DIY anchor system. Loop paracord through any attachment point (or around the pad) and stake it to the floor. Crude but effective, adjust tension so the pad stays put without being crushed.
Pro Tip
If your tent has a bathtub floor (raised walls), your pad won't slide as much as it would on a flat floor. Taller bathtub floors create natural friction. When shopping for a tent, this is worth considering if you know sliding is a problem for you.
How to Keep a Sleeping Pad From Sliding on a Cot
A cot is different: the fabric is stretched tight, even more slippery than a tent floor, so the pad slides sideways or shifts lengthwise.
Strap and Fastener Solutions
Use cot-specific straps. Many cots have pad attachment points, use them to keep the pad centered. Aftermarket straps fit most standard cots.
Wrap paracord around the cot frame. Loop paracord through the frame and around your pad to create holding tension, a minute's work on any cot.
Secure the pad to the cot legs. Tie the pad to the legs with short cords to stop lengthwise sliding, but keep them loose enough to move inside the pad.
Friction-Based Fixes
Add a textured layer between pad and cot. A thin foam pad, yoga mat, or towel under your pad increases grip, cot fabric holds these better than a smooth pad.
Use grip tape on the cot surface. Stick adhesive grip tape to the cot's fabric top to give your pad something to hold, a permanent fix.
Try a non-slip mat sized for your cot. Cot-dimension mats sit between cot and pad and prevent sliding in all directions.
Watch Out
On a cot, sliding is more dangerous than in a tent because you can fall off the side. Always test your setup with gentle movement before you settle in for the night. Make sure your pad is secure before putting your full weight on it.
Using Sleeping Pad Straps for Stability
Sleeping pad straps are the most direct fix: instead of relying on friction, they mechanically tie the pad to the tent floor or cot frame. They're affordable and light, but the wrong style can crush an inflatable pad or fail on a slope.
Types of Sleeping Pad Straps
- Loop-and-stake straps: webbing loops or grommets on the pad connect to short cords and stakes. These work only if your pad has attachment points; many inflatable pads do, especially backpacking models.
- Wrap-around straps: adjustable webbing wraps around the pad's circumference at the head and foot, then anchors to stakes or the tent frame. These work with any pad shape and are the most versatile option.
- Cot-specific straps: designed to clip or wrap around cot frames and hold the pad centered. Some cots include them; aftermarket versions fit most standard cot widths.
- Buckle-and-velcro hybrids: a buckle for quick release plus velcro for micro-adjustment. Convenient, but velcro wears out and collects debris.
Why Straps Beat Friction Alone
Friction depends on surface contact and body weight, so it fails on slopes, in condensation, or when you shift repeatedly. Straps create a mechanical hold independent of texture, keeping the pad in place even on uneven ground, at the cost of setup time and anchor points.
Installation and Tensioning
- Position the pad first. Lay it where you want it before attaching straps.
- Wrap at the head and foot. These points move least and anchor easiest; some add a third strap at the waist on slopes.
- Anchor to stakes or frame. Drive stakes at head and foot in a tent, or wrap the frame rails on a cot.
- Tension to hold, not compress. The pad shouldn't shift when pushed sideways, but you should slide a hand under the strap. Over-tensioning creates pressure points or stress seams.
Watch Out
Never over-tighten straps on an inflatable pad. Compression can reduce loft, create cold spots, and stress the seams. Test tension by pressing down on the pad, it should feel the same as an unstrapped pad.
Straps vs. Non-Slip Mats: When to Choose Which
- Choose straps on slopes, in tents with stake-out points, or on cots with wrappable frames, the most secure hold.
- Choose a non-slip mat for zero setup, no anchor points, and the lightest solution, especially on flat ground or with a textured pad.
- Use both in demanding conditions: the mat handles micro-sliding, straps handle macro-sliding, and combined weight stays under a few ounces.
Cost and Weight
If you camp regularly, keep a set in your kit as backup even if you primarily use a mat.
Key Takeaway
Straps are the most secure fix for a sliding pad, especially on slopes and cots, but they require anchor points and careful tensioning. Pair them with a non-slip mat for a belt-and-suspenders setup that weighs almost nothing.
Non-Slip Mat for Sleeping Pad: Choosing the Right Option
A non-slip mat is the simplest fix: lay it down, put your pad on top, and the interface does the work. But "non-slip mat" covers wildly different products, and the wrong one adds weight without solving the problem.
How a Non-Slip Mat Actually Works
Friction depends on surface roughness, contact area, and how much materials deform under load. Tent floors and inflatable pad bottoms are both smooth and hard, so contact area is high but interlocking is low, that's why they slide. A non-slip mat introduces a softer, higher-friction interface that deforms under your weight and interlocks with both floor and pad.
Inflatable Honeycomb Camping Sleeping Mattress Mat →
That mechanism explains two practical rules:
- Thicker and softer is not always better. A mat that compresses too much under a point load (hips, shoulders) can bottom out and lose grip exactly where you need it. A mat in the roughly 1/16-inch to 1/8-inch range typically balances conformability and support.
- Grip depends on the pad, too. A textured inflatable pad bottom grips a mat far better than a smooth one. If your pad has a brushed or dotted underside, you may need less mat than someone with a slick nylon pad.
Material Comparison
| Material | Grip Level | Weight (typical) | Durability | Best For | Cost |
|---|---|---|---|---|---|
| Rubber (natural or recycled) | Excellent | Heaviest | Very durable | Car camping, base camp, cot use | $20-$35 |
| Cork | Good | Light | Moderate | Tent use on flat ground | $15-$25 |
| Synthetic blend (PVC-free, TPE, or silicone-treated fabric) | Very good | Light to moderate | Good | Backpacking and tent use | $12-$22 |
| Closed-cell foam | Fair | Lightest | Good | Budget or emergency use | $8-$15 |
Rubber mats deliver the highest friction, soft enough to conform, dense enough not to bottom out, but the weight and packed size suit car camping or cots, not backpacking.
Synthetic blends are the most common camping-specific option, often with a silicone-treated or dotted underside that grips floor and pad and packs small.
Closed-cell foam offers minimal grip but is the lightest, cheapest option and doubles as a sit pad or emergency layer, better than nothing.
Matching the Mat to Your Pad and Shelter
- Smooth-bottom inflatable pads: choose a synthetic blend or rubber mat textured on both faces; a smooth-topped mat will slide against the pad.
- Textured or brushed-bottom pads: a thinner cork or synthetic mat is usually enough.
- Closed-cell foam pads: these already grip tent floors well; a mat is often unnecessary unless you're on a slope or in condensation.
- Cot use: prioritize rubber or a high-friction synthetic, since cot fabric is slicker than most tent floors.
- Dimension matters: a mat roughly the same footprint as your pad prevents edge migration overnight.
Installation and Care
Placement. Lay the mat down first, then the pad on top. Smooth out wrinkles, a bunched mat creates pressure points and reduces contact area.
Cleaning. Synthetic and rubber mats wipe clean with a damp cloth; brush cork occasionally and dry it fully before storage to prevent mildew.
Durability. Rubber lasts many seasons, cork and synthetics three to five years, and foam degrades faster but costs less to replace.
Key Takeaway
For most campers, a synthetic blend non-slip mat with texture on both faces offers the best balance of grip, weight, and cost. Car campers and cot users can step up to rubber for maximum hold; backpackers should prioritize a thin, light synthetic mat and accept slightly less grip.
Quick Fixes for Emergency Situations
At camp with a sliding pad and no straps or mat? Use gear you likely have.
Create friction with a towel or tarp. Any fabric layer under your pad, a camp towel, tarp piece, or rain jacket, increases grip.
Pile gear around the pad. Backpacks, water bottles, and other gear create a barrier that won't prevent sliding but can reduce it.
Move to a less sloped spot. Even a slight move to flatter ground means less sliding.
Preventing Sliding Before Your Trip
The best solution is prevention, set up your system before you camp.
Choose the right sleeping pad. Closed-cell foam grips better than inflatable, and textured inflatable surfaces grip better than smooth ones.
Inspect your tent floor. Check for holes or tears, which worsen sliding, and patch any damage before you camp.
Sleeping pad sliding ruins sleep and leaves you cold.
At Roam Ready Outdoor, we recommend starting with sleeping pad straps or a non-slip mat. If you use an inflatable pad like our Inflatable Honeycomb Camping Sleeping Mattress Mat (starting at $29.99), adding a non-slip mat underneath gives you reliable stability on any terrain. For car camping or base camp trips, our TPU Thickened Double Air Mattress Outdoor Sleeping Mat ($72.35) offers excellent comfort and pairs well with friction-based solutions.


Test your setup before your trip, a secure sleeping pad means better sleep and better adventures.
Frequently Asked Questions
How do I keep my sleeping pad from sliding around in a tent?
Use a combination of friction and anchoring. Place a non-slip mat or yoga mat under your sleeping pad, secure it with straps or guy lines tied to tent anchor points, or use adhesive-backed grip tape on the tent floor. For inflatable pads, ensure the tent floor is clean and dry before setup. Most campers find that a non-slip mat alone solves 70% of sliding issues, especially on smooth nylon tent floors.
Can sleeping pad straps damage an inflatable pad?
Quality sleeping pad straps won't damage your pad if installed correctly. Avoid overtightening straps, which can pinch the material or create stress points. Use straps with soft padding or wrap them with fabric tape for added protection. Inspect your pad regularly for signs of wear. Most modern straps are designed with inflatable pads in mind and distribute pressure evenly across the surface.
What is the best non-slip mat for sleeping pad use?
Specialized camping non-slip mats designed for sleeping pads offer lightweight options. Avoid thin plastic tarps, which provide minimal grip. Test any mat with your specific pad type before a trip to ensure compatibility.
How do I stop a sleeping pad from sliding off a cot?
Cots require different solutions than tent floors. Use adjustable straps with hooks or carabiners to secure the pad directly to the cot frame. Alternatively, place a non-slip mat on the cot surface before adding your pad. Some campers use fitted sheets to hold the pad in place, though this works best with firmer pads. Test the setup at home before your trip to ensure the pad stays centered during movement.

